Serverless is a framework for creating applications using Platform as a Service providers. At the moment it only allows using Amazon Web Services but Microsoft Azure should be supported soon.
To use Serverless we need NodeJS version 6.6.0 or higher.
NodeJS can be easily installed and managed using Node Version Manager (NVM) application. I use Ubuntu 15.10 as my local environment and installed NVM as described here using :
curl -o- https://raw.githubusercontent.com/creationix/nvm/v0.33.1/install.sh | bash
It has added an entry to classpath in my ~/.bashrc To make “nvm” command recognized in shell we should reload .bashrc with
. ~/.bashrc
Then we may list all available versions of NodeJS:
nvm ls-remote
It would print something like:
v6.8.0
v6.8.1
v6.9.0   (LTS: Boron)
v6.9.1   (LTS: Boron)
v6.9.2   (LTS: Boron)
v6.9.3   (LTS: Boron)
v6.9.4   (LTS: Boron)
v6.9.5   (LTS: Boron)
v6.10.0   (Latest LTS: Boron)
We can install version which we want:
nvm install v6.10.0
First we have to install Servlerless:
npm install serverless -g
We can generate application stubs from existing AWS template.
Let’s create a new project folder - call it “serverless-reservation”.
In the folder from command line we can generate the stubs:
serverless create -t aws-nodejs
There exist also templates for Python and Java but we will use NodeJS at the moment, because it better fits into Servlerless framework landscape (the framework itself is also written in NodeJS). Moreover, NodeJS performance on AWS Lambda is known to be better than e.g Java.
We should now have initial project setup scaffolded and can start adding new features. There are 3 files:
- handler.js which contains the code for first demo ‘Hello World’ function. A ‘function’ term in Serverless framework means AWS Lambda function. An ‘event’ term means HTTP endpoint in AWS API Gateway.
- serverless.yml which is a configuration file where we define project functions, events that trigger them and other various resources such as e.g. S3 buckets, DynamoDB tables. This file is translated by framework into single AWS CloudFormation template which defines AWS infrastructure. Then it is deployed on AWS.
We should update a couple of things in auto-generated sources:
- Change “service” property in serverless.yml
service: serverless-reservation - Add new API Gateway endpoint First we will try just to invoke an existing (generated) function from the HTTP endpoint so we will add an event under the existing function.
functions:
  hello:
    handler: handler.hello
    events:
      - http:
          path: hello
          method: get
This says to call function handler.hello (from file handler.js ) when user queries endpoint /hello
We can test how the API behaves on our local before we deploy it on AWS. This is very useful for writing tests.
serverless invoke local -f hello
will print:
{
    "statusCode": 200,
    "body": "{\"message\":\"Go Serverless v1.0! Your function executed successfully!\",\"input\":\"\"}"
}
We can also invoke it straight on AWS
serverless invoke -f hello
Before we deploy the app on AWS we need to first setup an account and configure access. There is already a nice recording showing how to setup the credentials. It was done when the AWS page was yet having an old look and feel but it is still comprehensive.
Once we have credentials we need to let serverless know about it
serverless config credentials --provider aws --key AKIAZCITC7GETPUUBS6Q --secret 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 --profile dev_profile
Here I’m setting a new profile called “dev_profile” with credentials. It will add an entry in “~/.aws/credentials” file. Let’s configure the profile in our application “serverless.yml”
provider:
  name: aws
  runtime: nodejs4.3
  stage: dev
  profile: dev_profile
Let’s deploy our first app.
serverless deploy -r us-east-1 -s dev
In the command above we explicitly define region (-r) , staging (-s). They are optional but useful if we had multiple environments in different regions. Default region which is used when no params are specified is “us-east-1”, default staging is “dev”.
A very nice feature for faster deployments is to redeploy only a specific function, e.g. the one which we’ve been working on recently, instead of redeploying whole application. We can do it with
servlerless deploy -f <function name>
in our case it would be
servlerless deploy -f hello
It should succeed with message:
Serverless: Stack update finished...
Service Information
service: serverless-reservation
stage: dev
region: us-east-1
api keys:
None
endpoints:
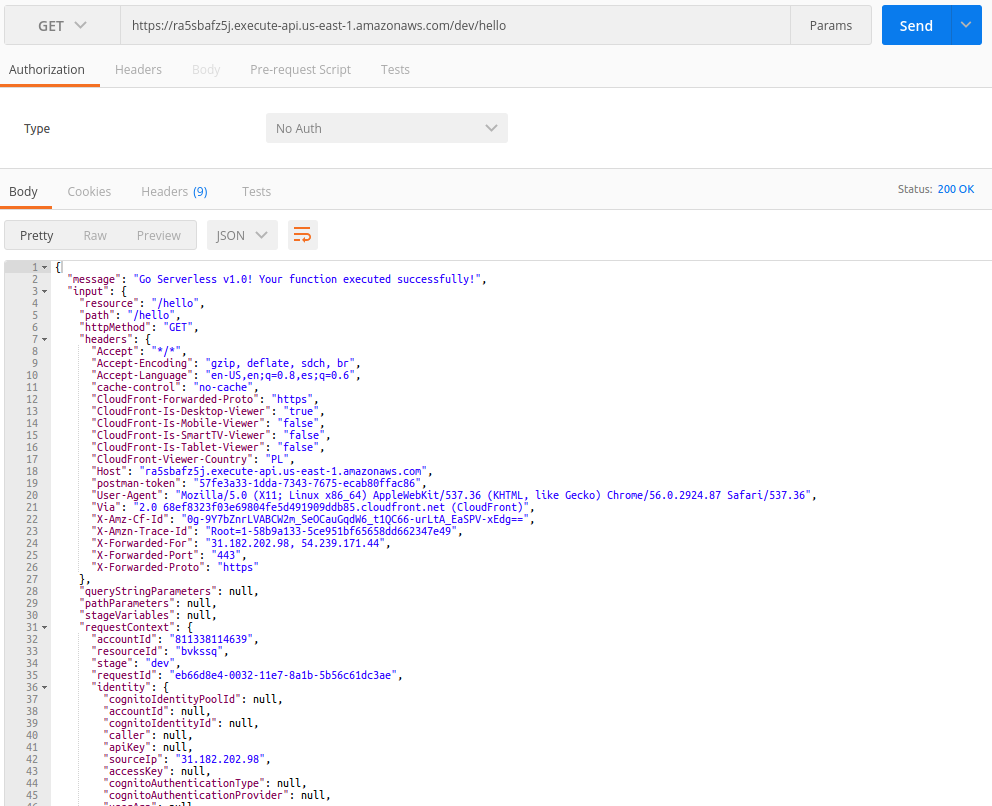
GET - https://ra5sbafz5j.execute-api.us-east-1.amazonaws.com/dev/hello
functions:
hello: serverless-reservation-dev-hello
If we login to AWS Console and go to CloudFormation in us-east-1 region we should see

We can try the URL and see how it works. For this I will use Postman but we could try with curl as sell (curl https://ra5sbafz5j.execute-api.us-east-1.amazonaws.com/dev/hello)
Another great feature is live logs tracking.
serverless logs -f hello -t
It would return sth like:
START RequestId: eb672679-0032-11e7-84fe-85f7a97485e6 Version: $LATEST
END RequestId: eb672679-0032-11e7-84fe-85f7a97485e6
REPORT RequestId: eb672679-0032-11e7-84fe-85f7a97485e6	Duration: 0.54 ms	Billed Duration: 100 ms 	Memory Size: 1024 MB	Max Memory Used: 16 MB
This way we do not have to download logs using AWS console.
Finally, when we do not want to keep the app on AWS anymore and pay the bills we can remove it.
serverless remove
So far we have seen how to run a demo endpoint on AWS using Serverless. Now we need to actually develop something useful for our serverless-reservation app. Let’s do it in next post.
References
comments powered by Disqus